一、说明
1.适用范围
热云TrackingIO作为国内第三方移动广告监测平台,能够更好的帮助广告主更精准的评估每次广告投放效果,以及帮助广告网络做广告系统的投放优化或业务数据的完善。
本文档适用于使来 开发的原生产品。
本文档适用于API Level 21及以上的安卓系统,及IOS9.0及以上的苹果系统
2.SDK下载
- 下载地址
- 最新SDK版本为:1.0.0
3.统计说明
为了能够在接入过程中保持概念统一,针对通用概念做如下说明:
- 设备
指某台安装了flutter应用的终端。
- 账号
指用户在某台设备上安装了应用之后,在应用中的唯一标识。
通常用作账号的标识符可以是用户注册应用时的唯一用户名(如邮件地址),也可以是用户注册时自动生成的唯一字符串。
二、接入流程
1.申请APPKEY
1)打开https://www.trackingio.com,使用您的热云账号进行登录。
2)进入“产品中心”,点击左上方**“+新建产品”**,完成产品创建,您将获得一串32位的16进制APPKEY;
如果您已经完成产品创建,请在如下位置获取APPKEY:全部产品按钮”-“对应产品”-APPKEY
APPKEY为应用的唯一标识,用于集成到SDK中。
注:为了保证您的数据安全,请勿泄露您的APPKEY。
2.导入SDK
1)前往最新SDK下载地址,下载SDK压缩包,解压至本地目录。
2)导入方法:
将解压后trackingio文件夹整体拷贝到flutter项目根目录下。
在 Flutter 项目下pubspec.yaml文件dependencies节点下添加trackingio_flutter_plugin依赖,配置如下:
trackingio_flutter_plugin:
    path: ./trackingio
导入后在 terminal中: 运行flutter packages get 或者在 IntelliJ中: 点击pubspec.yaml文件顶部的’Packages Get’(在Android Studio中如图):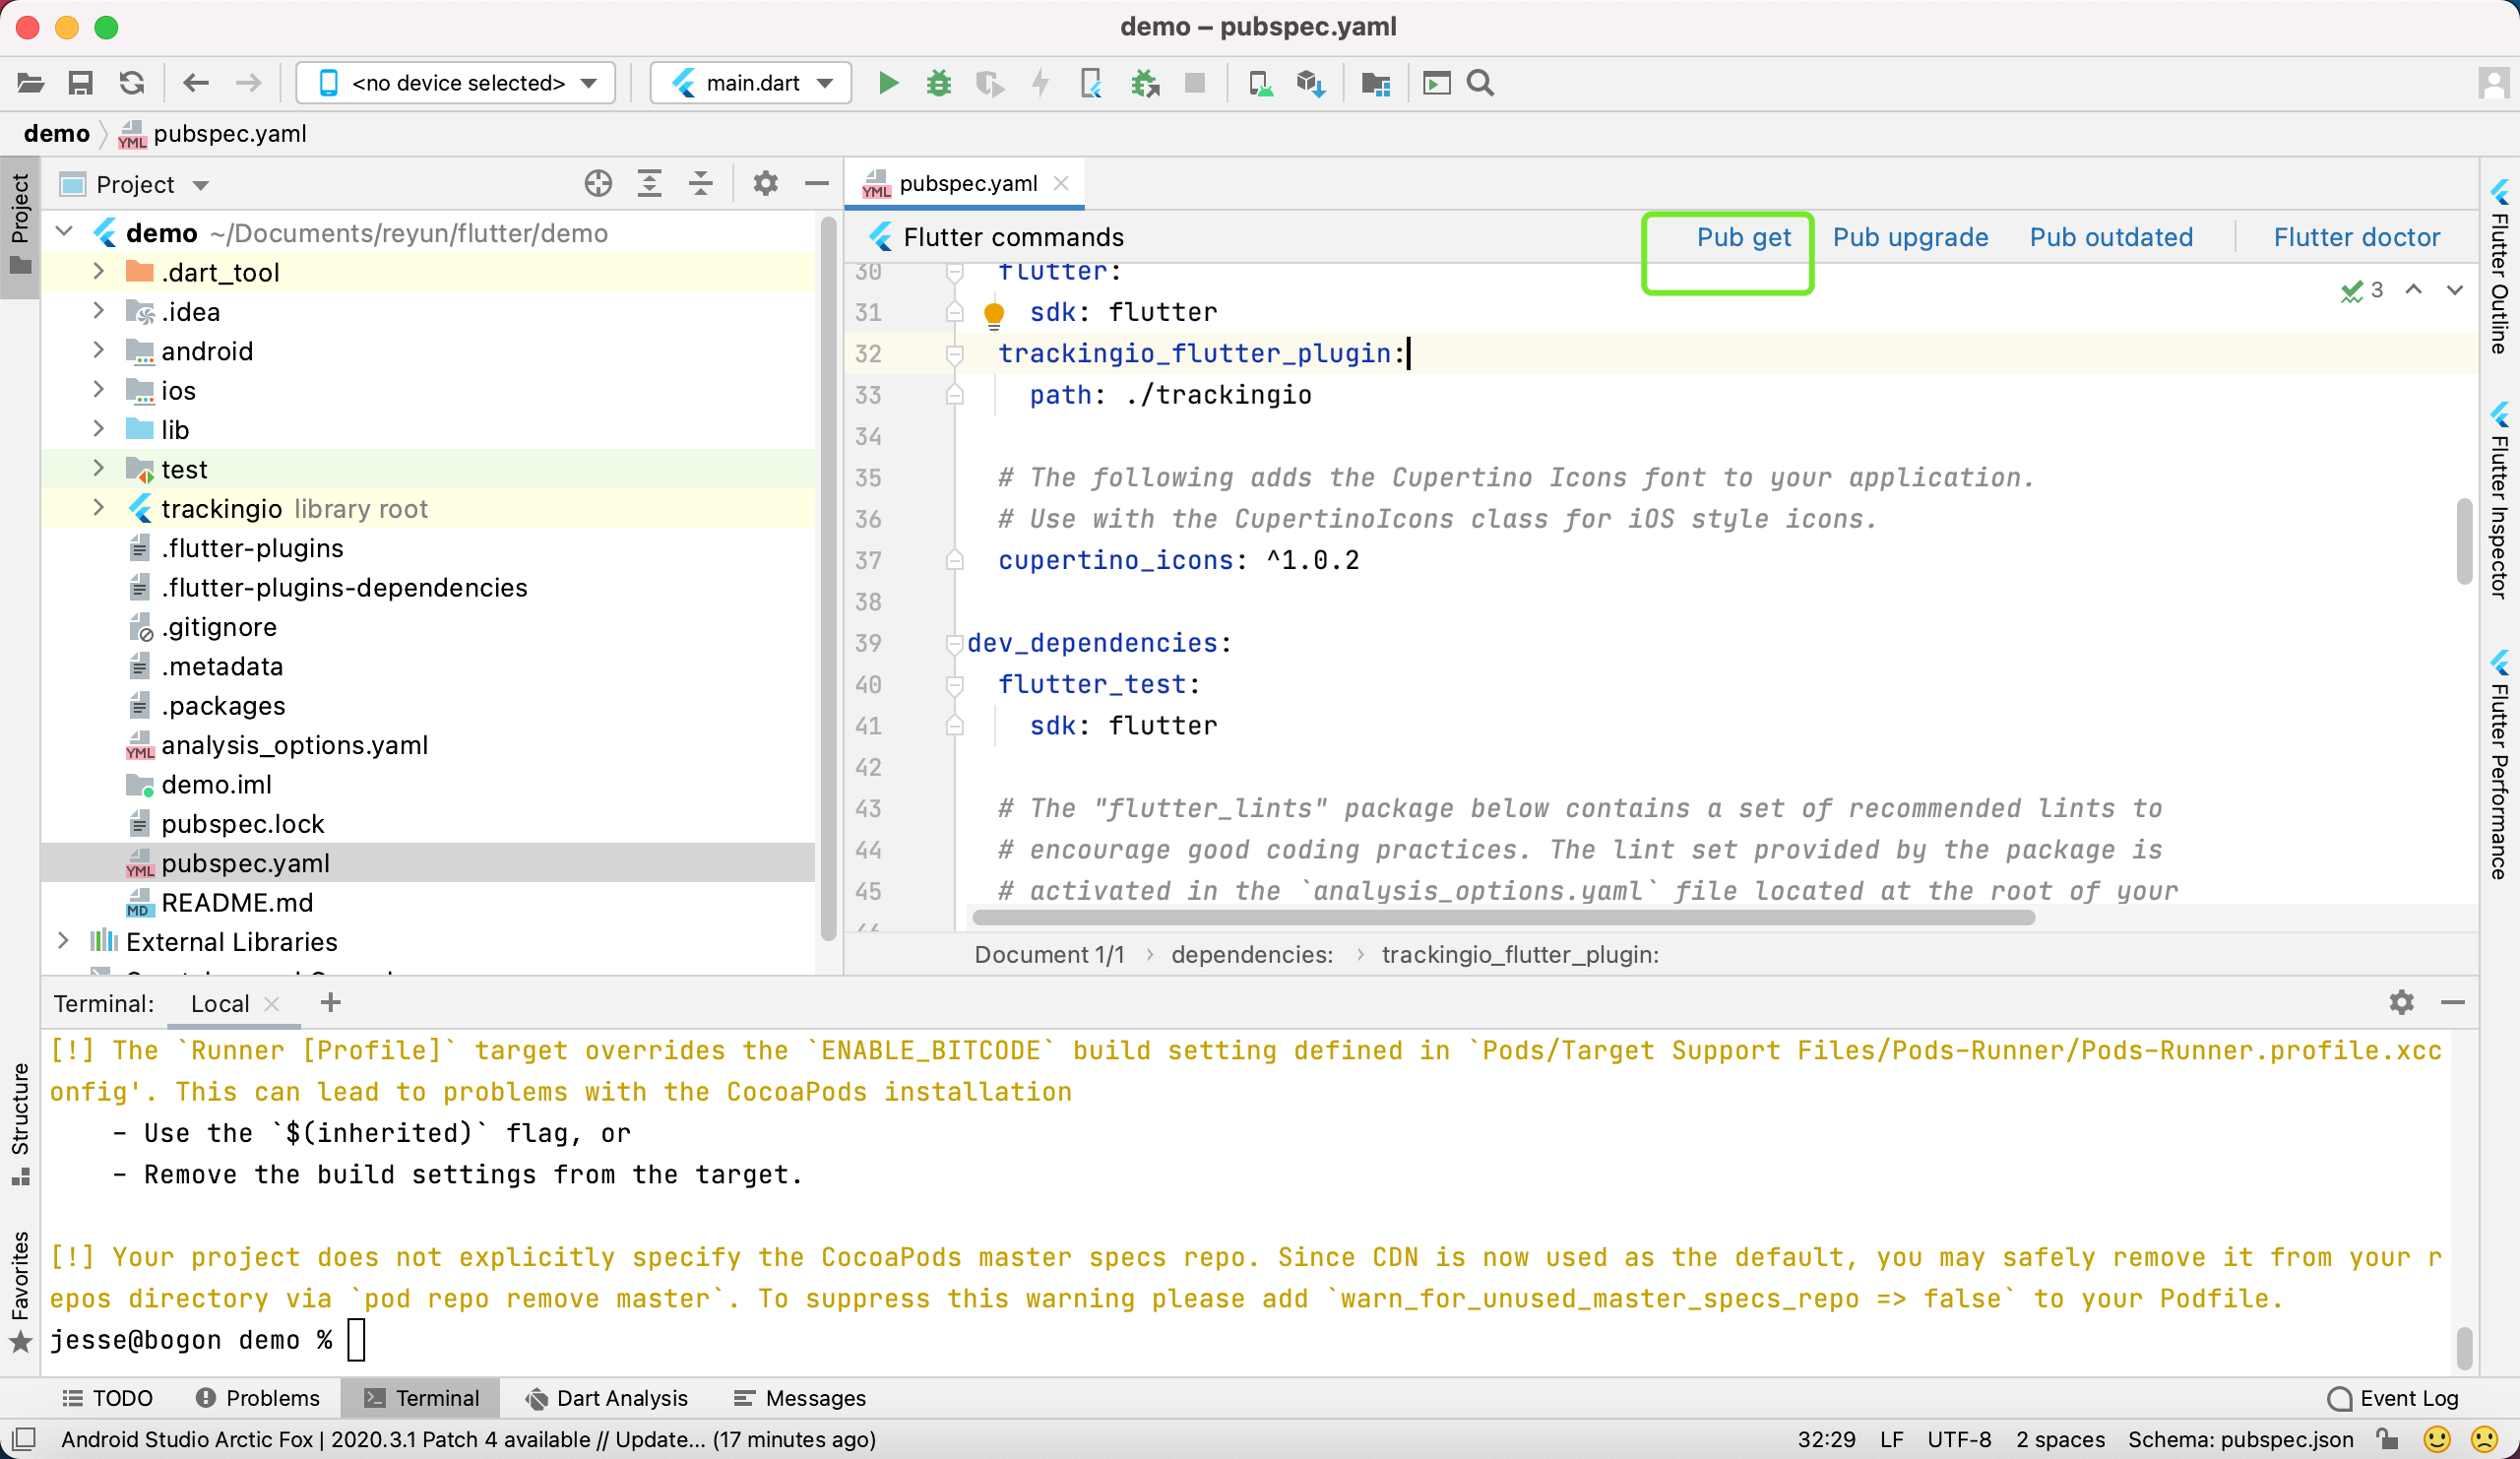
三、接入方法说明
(1).iOS端配置:
在执行flutter packages get命令时,会自动在 ios 目录下执行pod install命令进行 iOS SDK 的SDK装载。如果您在使用 iOS SDK 初始化原生函数时,找不到头文件,可以到 iOS 目录下手动执行一下pod install命令:
cd ios && pod install
确保pod安装成功后,使用Xcode打开/ios目录下的xcworkspace工程,并修改Runner/AppDelegate.m.如图:
进行dart端代码调用后 执行
flutter build ios --no-codesign
然后打开原生Runner.xcworkspace工程执行调试与发布。
(2)Android端配置:
在工程目录下android文件夹内工程进行如下配置
1.添加权限和依赖框架
1.1权限列表
在AndroidManifest.xml文件中添加如下权限
//网络访问权限
<uses-permissionandroid:name="android.permission.INTERNET"/>
//获取网络状态权限
<uses-permissionandroid:name="android.permission.ACCESS_NETWORK_STATE"/>
//获取wifi状态权限
<uses-permissionandroid:name="android.permission.ACCESS_WIFI_STATE"/>
//读取手机IMEI的权限,须在获得此权限后再初始化sdk,如果缺少此权限,会以AndroidID作为设备唯一标识符
<uses-permissionandroid:name="android.permission.READ_PHONE_STATE"/>
注:Android系统版本6.0以上,必须先获取权限,再调用初始化接口。反之,会影响激活数据精准度。
1.2在应用的build.gradle下增加如下配置
ndk { abiFilters 'armeabi-v7a','x86','arm64-v8a','x86_64','armeabi' }
packagingOptions {
    doNotStrip "*/armeabi-v7a/*.so"
    doNotStrip "*/x86/*.so"
    doNotStrip "*/arm64-v8a/*.so"
    doNotStrip "*/x86_64/*.so"
    doNotStrip "armeabi.so"
}
注:具体配置项可根据app自身清空删减。
1.3如需混淆,则加入如下配置
###针对移动智能终端补充设备标识体系统一调用SDK###
-dontwarn org.bouncycastle.**
-keep class org.bouncycastle.** {*;}
-keep, includedescriptorclasses class com.asus.msa.SupplementaryDID.** { *; }
-keepclasseswithmembernames class com.asus.msa.SupplementaryDID.** { *; }
-keep, includedescriptorclasses class com.asus.msa.sdid.** { *; }
-keepclasseswithmembernames class com.asus.msa.sdid.** { *; }
-keep public class com.netease.nis.sdkwrapper.Utils {public <methods>;}
-keep class com.bun.miitmdid.**{*;}
-keep class com.bun.lib.**{*;}
-keep class com.samsung.android.deviceidservice.**{*;}
-keep class a.**{*;}
-dontwarn com.reyun.tracking.**
-keep class com.reyun.tracking.** {*;}
Android初始化接口需在native层MainActivity.java内使用java代码进行调用,如需改变调用时机,进行权限获取等操作请自行编码后在合适时机调用热云init函数。示例:
package com.example.demo;

import io.flutter.embedding.android.FlutterActivity;


import com.reyun.tracking.sdk.Tracking;
import androidx.annotation.Nullable;
import android.os.Bundle;

public class MainActivity extends FlutterActivity {
    @Override
    protected void onCreate(@Nullable Bundle savedInstanceState) {
        super.onCreate(savedInstanceState);
        Tracking.setDebugMode(true);
        Tracking.initWithKeyAndChannelId(getApplication(),"your appkey","_default_");
    }
}
(3).dart接口使用示例代码:
import 'package:flutter/material.dart';
import 'package:flutter/services.dart';
import 'package:trackingio_flutter_plugin/trackingio_flutter_plugin.dart';

void main() {
  runApp(const MyApp());
}

class MyApp extends StatelessWidget {
  const MyApp({Key? key}) : super(key: key);

  // This widget is the root of your application.
  @override
  Widget build(BuildContext context) {
    return MaterialApp(
      title: 'Flutter Demo',
      theme: ThemeData(
        // This is the theme of your application.
        //
        // Try running your application with "flutter run". You'll see the
        // application has a blue toolbar. Then, without quitting the app, try
        // changing the primarySwatch below to Colors.green and then invoke
        // "hot reload" (press "r" in the console where you ran "flutter run",
        // or simply save your changes to "hot reload" in a Flutter IDE).
        // Notice that the counter didn't reset back to zero; the application
        // is not restarted.
        primarySwatch: Colors.blue,
      ),
      home: const MyHomePage(title: 'Flutter Demo Home Page'),
    );
  }
}

class MyHomePage extends StatefulWidget {
  const MyHomePage({Key? key, required this.title}) : super(key: key);

  // This widget is the home page of your application. It is stateful, meaning
  // that it has a State object (defined below) that contains fields that affect
  // how it looks.

  // This class is the configuration for the state. It holds the values (in this
  // case the title) provided by the parent (in this case the App widget) and
  // used by the build method of the State. Fields in a Widget subclass are
  // always marked "final".

  final String title;

  @override
  State<MyHomePage> createState() => _MyHomePageState();
}

class _MyHomePageState extends State<MyHomePage> {
  String _deviceid = '';
  @override
  void initState() {
    super.initState();
    initPlatformState();
  }

  // Platform messages are asynchronous, so we initialize in an async method.
  Future<void> initPlatformState() async {
    String devid = "";

    // Platform messages may fail, so we use a try/catch PlatformException.
    try {
      devid = (await TrackingioFlutterPlugin.getDeviceId)!;
    } on PlatformException {
      devid = 'Failed to get distinctId.';
    }

    // If the widget was removed from the tree while the asynchronous platform
    // message was in flight, we want to discard the reply rather than calling
    // setState to update our non-existent appearance.
    if (!mounted) return;

    setState(() {
      _deviceid = devid;
    });
  }
  @override
  Widget build(BuildContext context) {
    // The Flutter framework has been optimized to make rerunning build methods
    // fast, so that you can just rebuild anything that needs updating rather
    // than having to individually change instances of widgets.
    return Scaffold(
      appBar: AppBar(
        // Here we take the value from the MyHomePage object that was created by
        // the App.build method, and use it to set our appbar title.
        title: Text(widget.title),
      ),
      body: ListView (
        children: <Widget>[
          ListTile(
            title: Text('_deviceid: $_deviceid\n'),
            onTap: () {
              initPlatformState();
            },
          ),
          ListTile(
            title: Text("login"),
            onTap: () {
              TrackingioFlutterPlugin.login("luid");
            },
          ),
          ListTile(
            title: Text("register"),
            onTap: () {
              TrackingioFlutterPlugin.register("ruid");
            },
          ),
          ListTile(
            title: Text("order"),
            onTap: () {
              TrackingioFlutterPlugin.setDD("ddid", "CNY", "10");
            },
          ),
          ListTile(
            title: Text("payment"),
            onTap: () {
              TrackingioFlutterPlugin.setZF("zfid", "alipay", "USD", "20");
            },
          ),
          ListTile(
            title: Text("adshow"),
            onTap: () {
              TrackingioFlutterPlugin.setAdShow("csj", "said", 1);
            },
          ),
          ListTile(
            title: Text("adclick"),
            onTap: () {
              TrackingioFlutterPlugin.setAdClick("csj", "caid");
            },
          ),
          ListTile(
            title: Text("viewduration"),
            onTap: () {
              TrackingioFlutterPlugin.trackView("page1", 10);
            },
          ),
          ListTile(
            title: Text("appduration"),
            onTap: () {
              TrackingioFlutterPlugin.trackAppDuration(100);
            },
          ),
          ListTile(
            title: Text("event"),
            onTap: () {
              TrackingioFlutterPlugin.setEvent("event_10", {"param1":"value22"});
            },
          ),
        ],
      ),
    );
  }
}